Why MFA is now a required process for personal and business use.
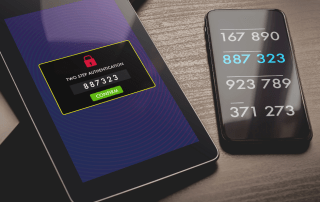
MFA, or Multi-Factor Authentication, is a security process that is now required for both personal and business use due to the rise in cyber attacks and identity fraud. Cyber criminals are becoming increasingly sophisticated, making it more difficult to keep sensitive information secure with traditional password protection alone.
With MFA, users are required to provide multiple forms of identification, such as a password and a fingerprint, to access their accounts, making it much more difficult for hackers to gain unauthorized access. This extra layer of security helps to safeguard against identity theft and protect personal and business information from falling into the wrong hands. As such, MFA has become a vital tool in the fight against cybercrime, ensuring that our personal and business data is kept safe from cyber threats.
Can you set up multiple people up on the same MFA for one login or account?
Yes, it is possible to set up Multi-Factor Authentication (MFA) for multiple people on a single login. This is known as shared MFA, and it allows multiple users to authenticate themselves using a shared MFA method, such as a security token or a code generated by an authenticator app.
Here’s a step-by-step guide on how to set up shared MFA using an authenticator app:
- Choose an authenticator app: First, choose an authenticator app that supports shared MFA, such as Google Authenticator or Microsoft Authenticator. These apps are available for free on both the Android and Apple app stores.
- Create a shared MFA configuration: Next, create a shared MFA configuration in your account settings. This will generate a QR code that you can scan with your authenticator app.
- Enrol in shared MFA: Each user will need to download the authenticator app and enrol in the shared MFA configuration using their own account credentials, such as a username and password. To do this, they will need to open the app and scan the QR code provided by the shared MFA configuration.
- Provide MFA code when logging in: Once enrolled, all users will be required to provide the MFA code generated by the authenticator app in addition to their own username and password to log in. The MFA code changes every few seconds for added security.
How do move MFA from one phone to another
To make your life easier when switching to a new Android or Apple phone, take advantage of the transfer tool available in the Authenticator app. To begin, ensure that you have the latest version of Authenticator installed on both your old and new phones. You can check for updates in the Play Store on Android or the App Store on iPhone.
Once you have the app installed on both devices, follow these steps on your old phone:
- Open Authenticator and tap the three-dot menu icon, followed by Transfer accounts.
- Select Export accounts and enter your PIN code when prompted.
- Choose the accounts you want to transfer, then tap Next.
It’s now much easier to transfer Authenticator accounts thanks to the import tool. On your new phone:
- Open Authenticator and tap Get Started.
- Tap Import existing accounts? located at the bottom of the screen.
- Select Scan QR code.
Your old phone may have one or multiple QR codes to scan. Follow the prompts to complete the transfer process, and you’ll receive a confirmation for each successful transfer.
Can’t retrieve your MFA? How do recover your account.
If you are unable to retrieve your Multi-Factor Authentication (MFA) and are locked out of your account, there are a few steps you can take to recover your account:
- Use backup codes: Many MFA systems will provide backup codes when you first set up MFA. If you have saved these codes, you can use them to log in to your account even if you don’t have access to your MFA device.
- Contact support: If you don’t have backup codes, the next step is to contact the support team for the service or app you are trying to access. They may be able to help you recover your account or reset your MFA.
- Verify your identity: To recover your account, you will likely need to verify your identity. This may involve answering security questions, providing personal information, or uploading a photo ID.
- Disable MFA: As a last resort, you can disable MFA on your account. This will allow you to log in without needing MFA, but it also means your account will be less secure. Be sure to set up MFA again as soon as possible to re-secure your account.
It’s important to remember that Multi-Factor Authentication is designed to protect your account from unauthorized access, so it’s crucial to keep your MFA device safe and secure. Be sure to have backup codes saved in a secure location, and don’t share your MFA device or codes with anyone else.
Hate using your phone for MFA? A new secure password manager has the answer
Are you tired of using your phone for Multi-Factor Authentication (MFA)? There is a new solution available that can help streamline the MFA process. It’s called Keeper, and it is a secure password manager that can be integrated into your preferred web browser. Keeper offers the ability to auto-fill passwords, and it takes security one step further by providing the ability to store and generate MFA codes. With Keeper, you can securely pass MFA requirements directly from your browser, without having to use your phone. Whether you’re an individual or a business looking to enhance security, Calvert Technologies can help you set up Keeper for your needs.

